
A three sided wrap can be a good solution for ball, egg shaped, cylindrical or three sided ornaments. My first three sided wrap was folded from a greeting card. In the photo above it is the second one from the top. The others were folded from 6" x 6" squares of card stock.
Wrap from Greeting Card
Before I cut and folded the card I centered the ornament gift on a square of tissue paper. (Other possible options are tulle fabric, crepe paper, cellophane or seasonal cocktail napkins. Whatever you choose, it should be colour fast.) The tissue paper was about 10" x 10".

I rolled the ornament in the tissue paper and set it aside to prepare the card.
The card was about 5 3/4" wide. I opened it up...

... and scored two more fold lines to divide the front of the card into three equal rectangles. Then I cut the the back of the card to make a fourth section that was the same width as one of the front sections.

After it was scored and cut it looked like this,

I creased each of the fold lines, placed a few spots of double sided tape on the bottom edge of the front of the card, centered the gift on the card ...

... and, beginning with the back of the card, rolled the wrap around the gift. The back of the card will be on the inside and the three rectangles made from the front of the card will be on the outside. I pressed along the taped edge to hold the wrap closed. (If I had used glue instead of tape I would have used paper clips to hold the wrap together until the glue had set.)

To compliment the winter scene I used two pieces of yarn to tie the ends of the tissue paper.

The three sides of the wrap looked like this,

Wrap from Card Stock
The wrap above was the perfect size for my 2010 gift ornaments but at that time of year (late October) I couldn't find just the right Christmas cards in the stores. So ... I made a visit to a scrapbooking shop and picked up some 12" x 12" card stock instead.
I cut each sheet of card stock into four 6" x 6" sheets.

I took one of the 6" x 6" squares and scored three fold lines to make three rectangles all the same width and one smaller rectangle to use as a tab. (Each of my rectangles is about 1 7/8 inches wide and the tab is about 3/8 of an inch wide. For a smaller wrap I could have made the rectangles narrower and I would have had a larger tab. To make a bigger wrap I would have needed a larger piece of card stock.)

As with the wrap made from the greeting card I creased each of the fold lines, placed the rolled gift on the card and rolled the wrap around the gift. To compliment the pattern of this paper I planned to stick a silver star on each of the name tags and I decided to use the silver stars to hold the wrap together too. To do so I left the tabs on the outside of the wraps. (As it turned out the stickers weren't quite up to the task so I also put two spots of double sided tape under the tabs.)

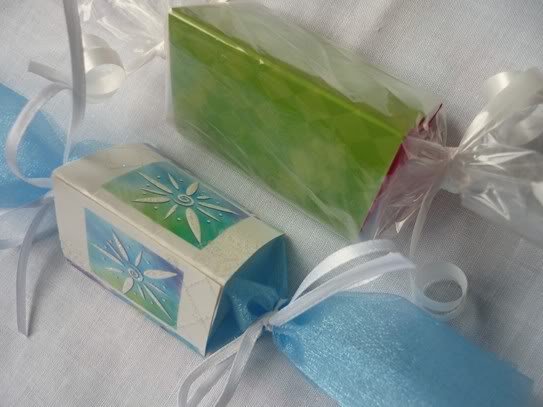
I used satin ribbon for these blue boxes,

curling ribbon for some red and gold boxes,

pipe cleaners for this violet coloured box and

the blue yarn on the winter greeting card box. (Above.)
Later I made some shorter boxes for some smaller gifts. I cut rectangles from Christmas cards for these wraps. I wrapped the white and blue card around some sheer wide ribbon and I wrapped some cellophane around a green card.

Pinwheel 2010

No comments:
Post a Comment